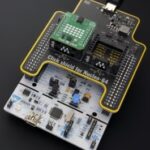
Join Lazina on this episode of TechVentures as she guides you on how to get started with the Vespucci board, a simple demonstration board designed by Future Electronics in partnership with STMicroelectronics.
It features ST’s low power Teseo-LIV4F standalone GNSS module, and Abracon’s active patch antenna.
Dive into the video to explore its features and how it can help you on your next project.
See the video or read the full transcript below.
Want to learn more and sign up for a chance to win a Vespucci Evaluation Board?
Are you looking to build a complete IOT solution with GNSS capability? Join me on this episode as I show you how to get started with the Vespucci board, a simple demonstration board featuring STMicroelectronics’ TESEO-LIV4F, a tiny GNSS dual band low power module.
Hi! Welcome back to TechVentures.
My name is Lazina, and I’m a Technical Marketing Engineer at Future Electronics
If you are interested in checking out any previous TechVentures videos, click on this link.
Today I’m going to show you how to get started with the Vespucci board.
Vespucci is a simple demonstration board designed by our very own Future Electronics System Design Center in partnership with ST Microelectronics. It features STMicroelectronics’ low power Teseo-LIV4F standalone module, which is an easy-to-use GNSS module embedding the Teseo IV single die standalone positioning receiver IC, which works simultaneously on multiple constellations (GPS/Galileo/Glonass/BeiDou/QZSS).
The Vespucci board is implemented in the mikroBUS™ format for maximum expandability. It comes with an Abracon GNSS/GPS/GLONASS Active Patch Antenna (APAGM2704A-C2G) and CR1025 coin cell battery for easy evaluation.
It’s pretty simple and straightforward to use.
The Vespucci board is compatible with the STM32 Nucleo-32/64/144 pin boards through the click shield boards as shown on the screen to expand development and try out new ideas.
The STM32 Nucleo-Click shield boards combined with the mikroBUS™ sockets provide immediate access to hundreds of Click boards™ allowing you to create a limitless number of applications with one host board.


The Vespucci demonstration kit is a good companion board for the ST Micro Cellular IoT Discovery kit (B-L462E-CELL1) to build a complete IOT solution with GNSS.

Alternatively, we can use a USB to UART cable with a 3.3V power supply to run a quick demo using the ST Teseo-Suite software. If you require assistance with the setup, please contact us at the email address shown on the screen: ESG_NA_Support@futureelectronics.com
For today’s video I’m going to use the FTDI cable method. I will plug my Vespucci board into the headers and plug this end of the cable into my laptop.
Next, we need to download Teseo-Suite Pro, which is a PC software tool to manage, configure and evaluate the performances of the Teseo GNSS family. It is available to download free of charge on st.com

Unzip the executable file and run the .exe application to install Teseo-Suite Pro.

After the installation process is complete, open the application.
While it’s loading, notice that Teseo-Suite automatically detects the GNSS module. That’s because, when the application is started for the very first time, Teseo-Suite scans all available UART COM ports to detect any connected receiver, no matter the protocol used.

You’ll be greeted with a screen like so:

As we can observe, I don’t have a fix, and that’s why there’s nothing in the signal level window. I will move my board closer to a window, and look at that, immediately I can see the satellites in view, the bands, and the information on the signal level.

The icon at the bottom of the form indicates which protocol is used by the device, either RTCM protocol or NMEA protocol. This window that’s open in the back is the sky view form. This shows the current azimuth and elevation of satellites used for the fix, this feature is only available in NMEA protocol.
The map view form shows the current position of the device on map.

The NMEA monitor is accessed by clicking this icon:

A form opens up like so:
There’s a filter functionality on the left, message viewer in the middle, the script editor in the top middle, decoding panel on the right. So if I double click on the line here, the content of the message is decoded in the panel on the right. The default view displays all the messages that have not been filtered. The thermometers are used as a cold start, warm start and hot start button.

I wanted to mention that the functions offered by the Teseo tool can be divided into two main areas:
- Viewer mode: this decodes and displays some views of NMEA or RTCM protocol.
- Test plan mode: this allows the module to write and run scripts on ST GNSS receivers.
This is only a brief overview of the many functionalities and capabilities of the Teseo-Suite Pro. If you’d like more information on the Vespucci board, please feel free


